
A quick introduction: by day, I'm a DevOps Engineer at Red Gate, a software company in Cambridge, UK. Outside of work, I enjoy both amateur radio (hence the callsign, M0VFC) and community broadcast radio at Cambridge 105. This blog aims to span all those interests - so feel free to ignore the posts that aren't relevant!
Feel free to get in touch on Twitter (@rmc47).
73 / Best wishes,
Rob
My first Summits on the Air (SOTA) activation was, apparently, 31st December 2007. It involved a 10m telescopic aluminium mast, 40Ah car battery and Icom IC-7000 lugged to the trig point on Detling Hill. Fine for a small summit like that, but entirely impractical for more challenging hills.
Since then, I've refined the equipment I carry. It's not as minimal as some folks, but it's working well for me at the moment:
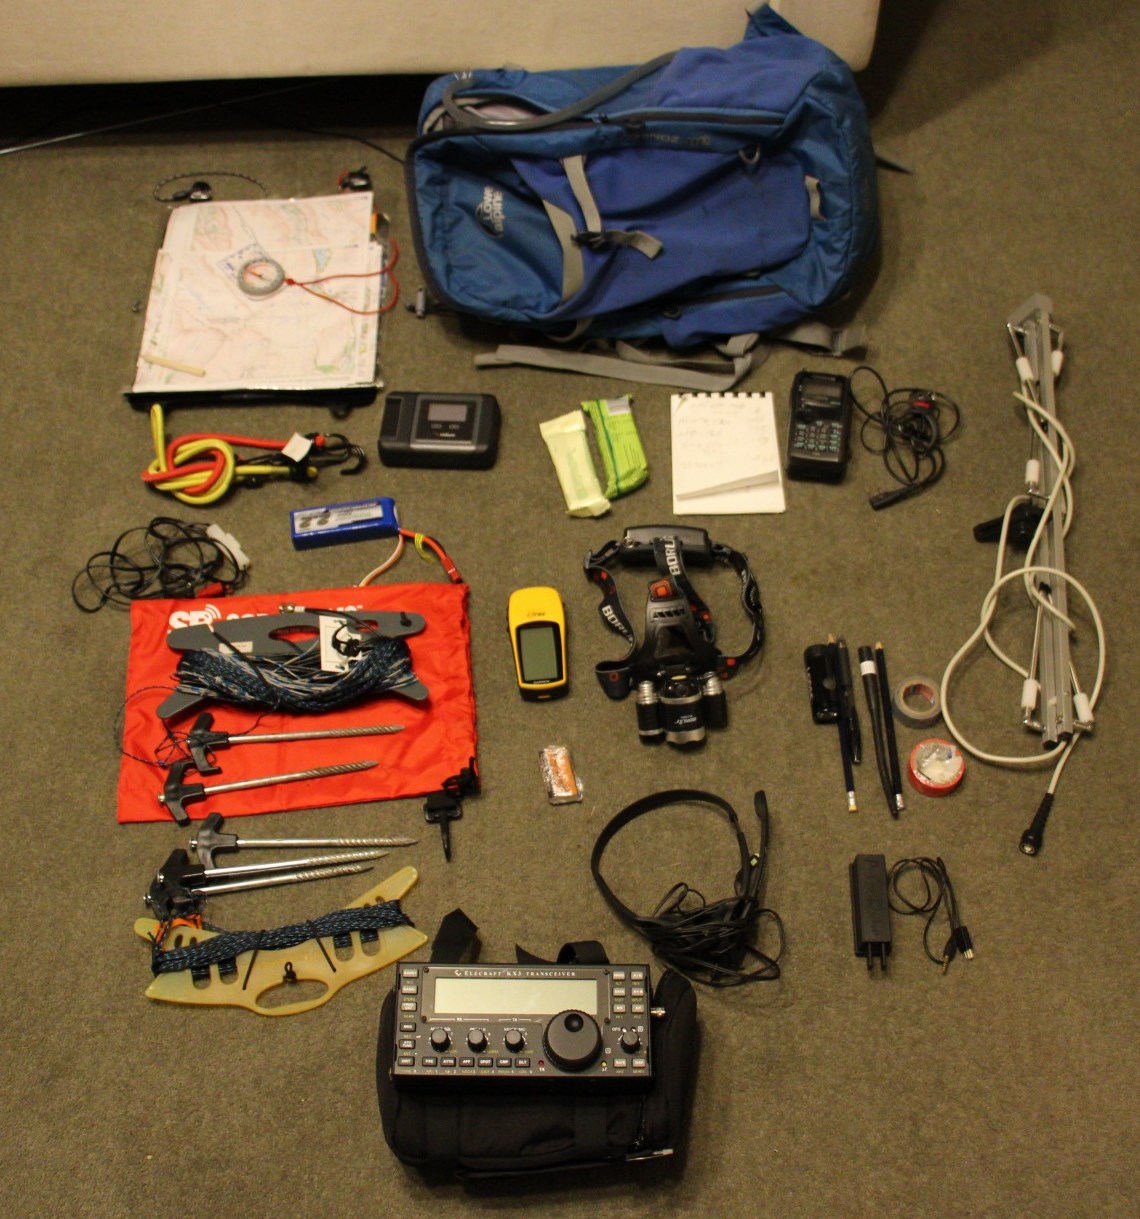
The key bits are:
All of the above packs into the blue rucksack, which also contains a CamelBack water pack. Including water, it weighs around 8.5kg.
IPv6 has been around for many years, but until recently, support was lacking from a lot of providers, including the major public cloud players. Amazon launched it in one of their US regions at the back end of 2016, and have now rolled it out across all their regions.
I assume they may have enabled it by default in new accounts, but if you already have infrastructure, you'll need to turn it on in a few places:
You can assign an IPv6 address to an existing instance by using Networking -> Manage IP Addresses.
I found that when creating a new Ubuntu 16.04 LTS instance from the current template (as of 2017-02-01), the network interface doesn't acquire an IPv6 address even if the EC2 console shows it having one. I fixed this by creating /etc/network/interfaces.d/60-ip6.cfg with a single line, iface eth0 inet6 dhcp to enable DHCPv6. The current Amazon Linux AMI works straight out of the box.
With that, you should be able to start using IPv6: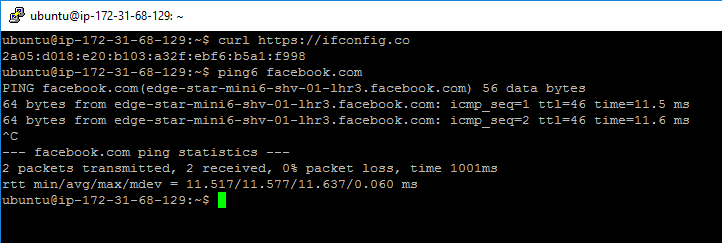
It's worth noting (thanks @jen20 for the reminder) that anything with an IPv6 address is publicly addressible - you can no longer hide behind NAT as a security feature. If you want an instance to be internally-routable only, then check out Egress-only internet gateways.
With the release of Windows Server 2016, there's a new version to play with: Nano Server.
Nano Server is a very lightweight, low surface-area server with no console access at all. It uses less disk space, less memory, and because there's less stuff in the box, there's fewer reboots for updates.
The flip side of this is that it doesn't do so much: there's no local console, not even the limited one you get with Server Core, and a bunch of other tools are missing - msiexec, for example. That means it's very much not for every workload. But I had something I thought would be suitable: a simple scheduled task running a .NET application.
To create a new Nano machine, a quick way of getting started is the Nano Server Image Builder. This is a friendly front-end to the PowerShell commands, and a good way of experimenting when you're first starting out. You'll need:
I installed the above directly on my (Windows 10) desktop PC; you might want to do them in a dedicated VM.
The image builder is mostly self-explanatory, but I tripped up a couple of times:
Having created the image and booted it, you're left at a basic login screen. There's not a lot you can do except enable and disable existing firewall rules - handy for turning on the ICMP Echo Request rule so it responds to pings!
So, how to actually use the new VM? Remote PowerShell, basically.
For interactive use, you can use New-PSSession -ComputerName foo then Enter-PSSession to get a remote console on the Nano VM on your desktop: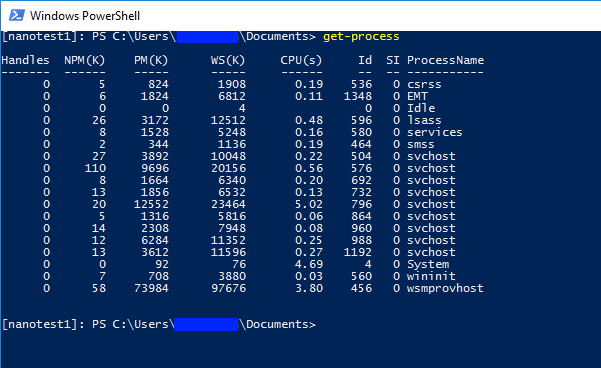
So far so good. But how to actually get code on there? We use Octopus Deploy for a lot of our application deployments, and it's great. Unfortunately, the agents (known as Tentacles) are .msi packages. Normally, that's a great thing, but with Nano there's no msiexec.
A bit of manual file copying later, and I realised the real blocker for my application: Nano is CoreCLR only - not the full .NET Framework. It's also 64-bit only (no WOW64), though that didn't affect me in this case.
Never mind, back to Server Core for now!